Wednesday, April 24, 2019

Still here and pluggin' away.

Sorry for not keeping up but I've been studying other peoples builds and criticizing my own then fighting discouragement to keep going. So here's what has been going on, last time I allowed myself to get side tracked by the building frame when I wasn't ready for it. So at this time I had acquired a couple sheets of exterior 3/4" ply to use for the building frame risers, and yes I am aware that it should not take two full sheets of plywood to make the risers but they were offered at no cost and the man helped me load them into my old pickup. Old attitudes from the railroad keep coming back to haunt me, "if it's for free, it's for me", hard to turn down free wood. So admitting to myself that I really shouldn't put the risers on the frame rails just yet, I decided that I'll just layout the 3/4" ply on the frame and enjoy an outdoor work area. And what more appropriate job for a 4'x16' table than to create the scarf joint for the bottom panel. But before I got into that mess, knowing that I don't need all that heavy ply, I thought that I would take this opportunity to make a router jig for shaping the centerboard.
A foil shaped router jig for centerboard.
I had made a tracing of the foil shape off the plan sheet and just laid it on a corner of the 3/4" sheet and marked through with an awl to commit the pattern to the wood. Then just "connect the dots" and cut it out and trim. Then just trace the freshly cut and trimmed shape onto the ply and repeat then the  next thing you know you've got a jig!
Jig in place, just make sure you get it facing the right direction.
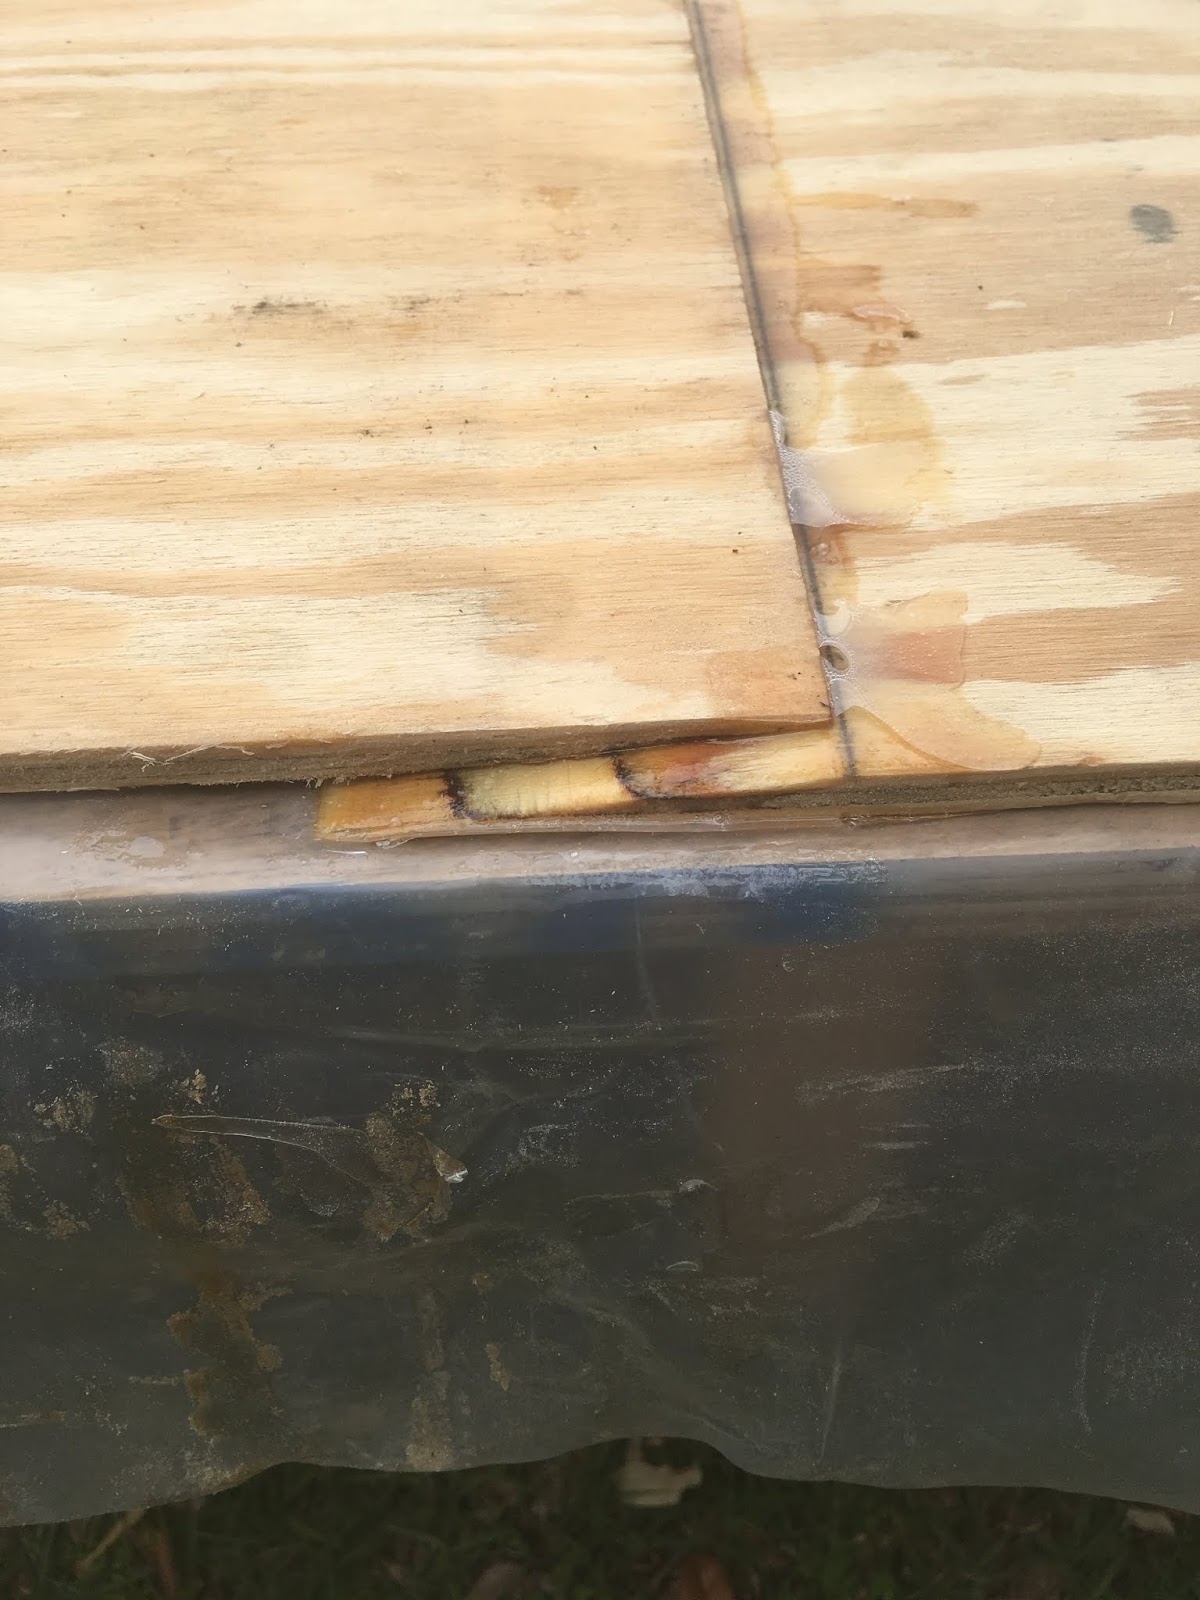
So anyway back at the alternative work area, I remembered what I had originally started to do and dragged out the two 3/8" ply sheets for the bottom panel and laid them out on the building frame/work table. Lined them up and marked out 3" on both sheets and adjusted the over lap and set an upper guide and clamped it all down. Then started first with my belt sander then my old jack plane and then back to the sander this time with a new belt.
Scarfing station for bottom panel. Still a good way to go.
 Meanwhile back in the garage, I had started eyeing the epoxy stuff and wondering when it would be time to start that. I know what Russell Brown and Geoff Kerr had said about making sure you have everything ready before you start, so on and so forth. Well I went ahead and jumped in without being ready and boy did I learn that lesson.
Looks good so far, but wait a minute,
What the heck is going on here?
Looks like slip sliding away!
It seems that when I lined it up and tightened down the clamp the panels, or rather the top panel slipped off to one side. Note to self, make sure both panels are securely located before adding clamps. That's not so bad, it gets worse.
Guess I need to work on my scarfing skills some more.
This is the under side of the same joint. I just marked off on either side of the defective joint and cut it out. It didn't look too bad from the top but after seeing the underneath, it was just a slap in my face over the shoddy workmanship I was willing to try to get by with. Shame on me. I don't understand why I seem to be in such a hurry to get anything done. This isn't a weekend project and I know it up front.
Dad's old saw.
By the way here is a shot of the circular saw my dad used to use when I was about 11 or 12, I'll be 68 this august. It is all aluminum, the only plastic is the baklight knob on the body for a guide handle. Honestly a seriously heavy saw.

Other experiments I tried the other day was gluing the center board stack of boards and the stem and its doublers. They both seem to have come out ok.
The clamp side of the centerboard against the plastic sheeting.
The top side of the board.
In the clamps, 5 of then to be exact.
Closeup of the lifting portion. Still needs some work yet.
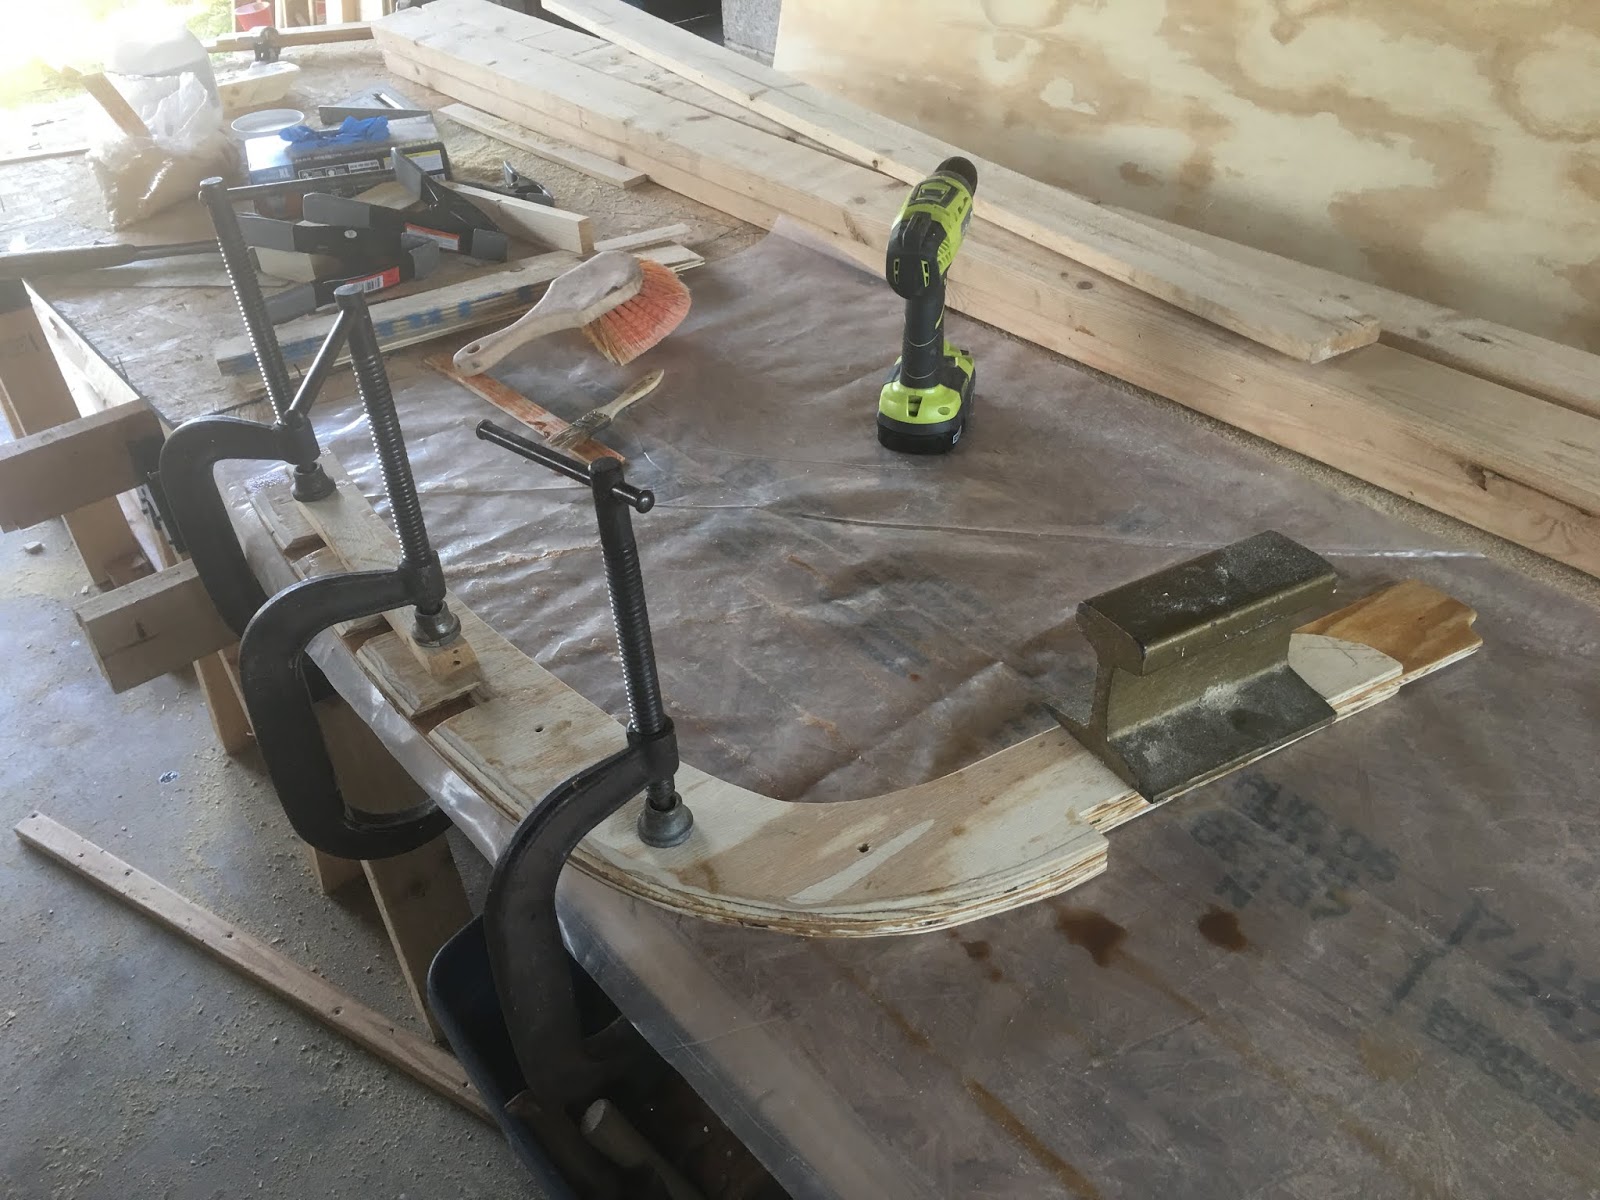
Also the stem and doublers.
Yes that is a piece of light gauge railroad track. (about 20 or so pounds, approx. 5inches long)
Undocumented before but with a slight curve in the leading edge portion of the stem, now after gluing miraculously no longer curved except where specified.
Now gone is the right hand curve in the forward stem portion

The bottom portion of the stem still straight as before.
The epoxy I'm using is RAKA from DuckworksBBS.com. I originally bought the deluxe package for building Jim Michalaks Piccup Pram but later decided to go ahead with the Navigator after all it is the boat that started all this for me. The kit contains 2 gals resin, 1 gal hardener, two rolls of 6oz fiberglass tape 4" wide, two yards of 6oz cloth, 5lbs wood flourand a few oz's of fumed silica. I chose to get the hardener half and half, fast and slow, not knowing how the Florida heat will affect cure times.
Still wrapped in the plastic bags they were shipped in the protect against leaks.
I also ordered three pumps, one for resin (full shot) and two for the hardener (half shot), one each so not to contaminate between slow and fast. Being as how it is a 2:1 ratio mixing.
Learn to mix epoxy carefully.
This is what an epoxy splash on your cotton t-shirt that doesn't "appear" to be fully mixed looks like after being washed and it comes out of the dryer. At first I thought is was a little lizard. (We have tons these of little lizards all over the place here. Harmless just not very people friendly).

Until next time, a wiser and much humbler,

Geoff


Tuesday, April 16, 2019

Back at it again!

Well as the title supposes, I'm back at it again. Working on building the parts and pieces to assemble a John Welsford Navigator. Just in case that last bout with doubt had given you cause to wonder if I had given up or was ready to through in the towel and try another plan. I must admit Mr. Oughtred's designs are quite alluring. But no, I have not succumbed to the siren call of another boat.

I have though, gone completely off the rails so to speak, and actually worked on the building frame. I am nowhere near ready for that and now that it's up I have nowhere to put it that is under cover and out of the weather until there is room for it in the garage! So it stays right where it is for now.
Building frame.
Since it was such a nice day, I decided to use it as an alternative work station. So I jumped on to the stem and doublers to ready them for gluing.
Stem doublers clamped together without the center section for work.
Close up of just the doublers and the beveled landing for the stringers.
Now with the center piece between the doublers.
Long shot all three pieces dry assembled.
And just for effect, a head on view.
I don't know if you can see the stringer landings very well but here is the stem with temporary screws to hold it together ready for gluing.
Well there's that four letter word, glue! I'm not really sure I am quite ready for gluing but I guess I have to start sooner or later. This will be my very first foray into the world of epoxy. Wish me luck, I guess.

Until next time,

Geoff


Sunday, April 14, 2019

Honestly now I think I'm fed up with fiddley bits

Well maybe not quite yet but it sure feels like it's getting there. Sorry no pictures this time left the phone/camera in the truck and didn't really feel like photographing anything. I didn't really seem to want to be there this last time (was actually Wednesday this week). I couldn't really concentrate and decide what to do while there. I actually started to put together the building frame, even though I'm nowhere near ready for it, and then when I got home realized that I used the wrong measurements to do it. So now the next time I go back I've got to take it all apart and redo it using the correct dimensions. The spacing for the bottom braces are different from the station (frames/bulkheads). And you guessed it I used the frame spacing instead of the bottom braces. It will come apart very hard and may well not be reusable, as I ran out of coated deck screws (which can be unscrewed easily) I filled in with coated (glued, which don't come out so easily) sinkers as they are called in the framing game. Also sometimes known as green toe nails to the new guy on the crew. ("Hey newbie, bring me a box of green toe nails! Yeah, they're right next to the board stretcher!") My son heard a lot of that stuff when he used to frame houses years ago.

I guess this is just a slump of sorts and hope it doesn't last too long. So I've gone to Off Center Harbor to watch some boat building videos to help jump start me again to get going on MY boat. Trouble is the Caledonia Yawl that Geoff Kerr keeps building is beginning to look really good. And construction "looks" to be a lot simpler. Of course it's a different style boat, open double ended, bigger too! It's amazing to watch him lift the completed hull off the building frame by himself, 200 lbs approx. weight, to flip it over.

However in all the videos of Caledonia and Ness yawls and Navigators, the Navigators seem to sail more upright in similar winds. Not that I'm saying that the other boats don't or can't sail upright it's just that I see those heeled more frequently and the skipper and/or crew hiking out more than the skipper and/or crew of Navigators. I guess those pretty lines of Iain Oughtred's are very captivating. I sure would like to see more videos of Navigators either sailing in company with other Navigators or just see them from other boats to watch them sail in the same conditions. Of course it wouldn't hurt to have Geoff Kerr build a John Welsford Navigator for an Off Center Harbor video series.

Just saying, until next time,

Geoff

Friday, March 29, 2019

More fiddling about with bits

My goodness I didn't think I would have spent so many days in a row working on my boat. It is amazing how much I've gotten done and even more amazing how much more is left to do! But first I thought I'd share my not so new multi tasking work station with you.

It's a 10" table saw and a 3" belt sander,
but wait, it's also a 10' compound miter saw! What a country!
So I had every intention of starting with the rear frame sections today but when I walked into the garage I spotted the transom and just went right to it. First using some of the 2x4's that I split and cut down to 20mm thick and still 3 1/2" wide, to shape the doublers for the outside perimeter of the transom.
Transom with solid wood doublers.
Then measuring out the boomkin hole and cutting out its doubler on my multi-tasking work station!
Multi-tasking work station is also a jigsaw center.
Man it just keeps getting better and better! How cool is this work station. It's almost like it was made for boat building.
Along with the boomkin doubler, I went ahead and fashioned the tiller opening doubler and the seat risers. Then added a motor mount support as well. I'm not sure that I will use an outboard, at least not right away, but just in case I decide to at a later date.
Fitted out just not glued up yet.
I took advantage of many scraps of 6mm ply and found three pieces large enough to fill the port side of the inner transom.
Next up bulkhead #1
First the anchor well floor support then the doublers for either side of the stem spine and doublers for the stringer notches. And lastly the top deck arch doubler.
All decked out.
Next the bulkhead #2 seat riser and stringer notch reinforcements. I used the measurements from Joel Bergen's hatches but found they wouldn't fit with the mast box so a slight modification to the sizes and what do you know there's room for all.
Hatches and mast box all sharing the same space.
The seat riser shown here will actually attach to the aft side of the bulkhead.
 Also cut out a pair of bulkhead doublers the will glue to the for'd face of the bulkhead one each on either side of the mast box. Sorry I didn't get any shots of those this time. Perhaps the next time I go I can get a pic or two. Careful cutting of the hatch openings allows the use of the cut outs for the hatch doors. I am intending to imitate Joel's hatch door latches, I haven't seen any other way of doing them that's so simple and reliable. "Simplicity afloat is the best guarantee of happiness", is a quote attributed to L.Francis Herreshoff. Can't argue with logic like that.
Setting it up again to have another look.
  Setting it up again certainly shows how large this boat will be, and also helps to encourage me to keep building. I also took this opportunity to show my sweet wife how I'm getting along as she was near by when I was starting to clean up and come home anyway.
Stem, bulkhead #1, bulkhead #2, frame #3, #4 and the center board case.
I do intend to get around to the rear frames next time.

So until next time,

Geoff


Thursday, March 28, 2019

Fiddley bits

To quote Mrs. Hughes of Downton Abbey, "you just stand around getting nibbley bits stuck in your teeth, like posh people do." So not exactly the same thing but I always laugh a little when I hear her say it.


Any way I started out today by tidying up a bit out in the garage, no pictures because I don't believe you need to see how cluttered and nasty my work area has to get before I can't stand it myself and clean up. However I did get a few shots of some of the fiddley bits I was starting to work on.
Doublers for the bulkhead where the stringers pass through.
I cut out a dozen of these 9mm doublers for the bulkheads at the places where the stringers need some strengthening. Got a bit carried away with one of them though.
That's one sharp hole saw, right through the work table! Easy there fella.
After the cutout party, I ran them through the table saw and cut them in half, 24 of them now. Then I brought out both #1 and #2 bulkheads and marked out where the stringer notch was to go and numbered their individual location for each bulkhead.
Bulkhead #1, and #2 just like it.
Next I decided to have a closer look at the way the stem and #1 & #2 bulkheads line up. I had read at least two blogs where the bulkhead #1 was too low and then was modified to relieve the difference. My concern was that I didn't want to find out until it had already been glued in place and the stringers were installed.
The king plank rest nicely in the cut outs for it in both bulkheads,
and lines up just like the plan drawing even with the top of the stem.
The next thing I checked into was the mast box that is to be screwed and glued to the forward side of the bulkhead #2 and contains both the mast step and the doubler for under the king plank.
Partial mock up of the mast box.
The mast step is to be 140 mm x 140 mm and 70 mm thick. There are two 20 mm x 140 mm that rise from the keel batton to the underneath the king plank. These are glued to the mast step, the king plank doubler, and the for'd face of the #2 bulkhead. There are two 9mm box sides that are glued and screwed to all the others and the king plank.
Top view of the mast box. (sorry, not enough clamps at the moment)
Mast box, dry fit of course, at this point.
Then I set about to create some 20 x 20 battons for the stringers.
Fiddley bits for gluing to the frames and bulkheads.

These will hopefully be suitable for stringers.

Also wider pieces for the transom doublers and such.
Then I thought that I should clean up a bit before calling it a day.
It's not spotless but it sure is better than it was before I started this morning. I can even see the floor in several places, much improved.

Until next time,

Geoff

Tuesday, March 26, 2019

I think there might be a boat in this pile of parts!

Who could imagine that you could hide a boat in less space than a one car garage? Well you can if it's all in pieces. That's what hit me like a ton of bricks. I've been hiding a boat in my son's garage. You know how it is, you work on something for a while and you know that you're making progress but you don't see anything yet. Then one day you realize that if you stand up a few of the parts you've been messing around with, and arrange them relatively in a fashion that resembles the plan, .......well you finally have a reasonable facsimile of the project you're working on. In this case a Navigator!
A "reasonable" resemblance of the boat that is to come.
 Now remember I said "reasonable" resemblance of a Navigator. No worse than any of the others I've seen researching the design on the web. At least not at this condition anyway.

So I showed up at my son's place to mess around in the garage attempting to construct pieces and parts that will be used at a later date to assemble a boat resembling a Navigator. Dove into the pile of parts and pieces, (it was really getting to be quite a tall stack) and came up with my transom.
Dragged it over to the table saw and proceeded to trim up the edges, then laid out the holes for the tiller and boomkin and cut them out. Then marked where the seat top will attach and the stiffeners that the seat fronts will get glued to, and also where the doublers for the boomkin hole and tiller hole will be glued.

Then I turned my attention to the #1and #2 bulkheads.
Bulkheads #1 &2 all trimmed and ready.
All trimmed and ready for gluing the fiddly bits on. So I said to myself, "Self," and myself says "yes", "what say we take a sneak peek at what it might look like if it were ready to assemble now?' And myself says, "yea man, let's check it out!" So I did and was pleasantly surprised at the resulting images. So I grabbed some more parts and fiddled with them some and added them to the set up.
The #3 bulkhead and frame. Notice the centerboard case in the shot too.
So then after fiddling around with the stem and doublers some, I decided to add them to the shot too.
"the boat" from the starb'd bow,
and from the port bow.
The aft frames are up on the shelf still. I was too giddy to get them down and just play build'a'boat with all the pieces. This all started when I wanted to make sure the cutout for the king plank would fit the plank. The rest just sort of happened, I guess.


This was what started all the fun today. I really enjoyed it even though my knee was up to about a 14 on a scale of 1 to 10. Such is life, even in the midst of our pain there is happiness.

So until next time,

Geoff


Friday, March 22, 2019

Progress, not fast but still, it's progress.

I was able to spend a little more time at my son's garage again today making some more progress toward the day when I can start assembling my pile of parts into a boat. I started by drawing and cutting out the center case cheek pieces and trimming them along with the center case doublers and the bottom curve of the case sides themselves. I also dug through the pile of lumber that I have and found a fairly decent piece of long leaf yellow pine that I am using for the center case logs.
Profile of the center case with doublers and cheek pieces

Forward end of the dry fit center case

Aft end of the dry fit centerboard case

Inner doublers and out cheek pieces
Fiddling around a bit with the center case dry fitting to see how it all should go together. It turned out to be an enlightening bit of fun. I have come away with an idea of how to order the assembly of all the pieces. John shows on the plans to counter sink screws from the inside to attach the doublers and cheeks as well as the 20x20 seat supports and the top case stiffeners. I think I will then fill the screw heads with epoxy and then glass the insides then attach the case logs to one side only then the other side to the rest of the assembly. Of course there will time to insure that the centerboard itself fits and has room to move through the entire range needed to go fully down and come fully up. By glassing the inner panels first before assembly, not only assures ease of process, it also helps control the inner dimension of the case. Thus allowing room for the board itself to be glassed without becoming too thick to move freely inside. At least that is my thinking at this point in time.

I also took a little time to mess around with a couple of other parts, the lower bulkhead of frame #3 and the upper arms of it also.
Frame #3 upper arms cut out and trimmed

Lower bulkhead portion of Frame #3 with the upper arms dry fit
Not much to write about here just that these were roughed out last week I think and now they're trimmed and dry fit together. Doublers for the hatches and the seat support will be added later when I start the gluing process.
Bulkhead #1
Again not much here but bulkhead #1 is ready for doublers and the anchor well floor support when the gluing starts. The plans show limber holes at the base of the bulkhead, however I'm not sure how they will fit with the 20x20 doublers on either side of the stem piece by the time the planking goes on. There won't be much room down there if any at all.

So another day at the workbench and a few more items get checked off of the to do list. Progress, not necessarily fast but progress none the less.

Until the next time,

Geoff